| Availability: | |
|---|---|
| Quantity: | |
Application:
The Benchtop Spectrophotometer is a powerful and highly precise instrument designed for
demanding color applications. Its ability to measure Specular Component Included (SCI) and
Specular Component Excluded (SCE) simultaneously, coupled with superior inter-instrument
agreement, makes it an ideal tool for advanced colour formulation and quality control, as well as
solving complex colour challenges. It is primarily used in industrial sectors with stringent colour
management requirements, such as coatings, plastics, textiles, automotive and cosmetics.
Advantage:
1. Transmission D/0 structure and reflection D/8 structure


2. Dual Optical Paths Spectrum Analysis Technology This technology can simultaneous access to both
measurement and instrument internal environmental reference data to ensure instrument accuracy and long-term stability.

3. Compatible with SCI/SCE measurement, and supports SCI+SCE simultaneous fast measurement The D/8 l
ighting observation condition recommended by the International Commission on Illumination is adopted to meet
the measurement needs of various industries; it can perform specular reflection (SCI) and specular reflection
excluding (SCE) measurements to gain a fuller insight into color data changes. It also supports simultaneous
and rapid measurement of SCI+SCE, with a test time of less than 4 seconds.


4. Equipped with Android operating system and rotatable capacitive touch screen The instrument APP
based on the Android operating system and the 7-inch large touch screen are as smooth and convenient
as daily mobile phone operations, making them easier to use.


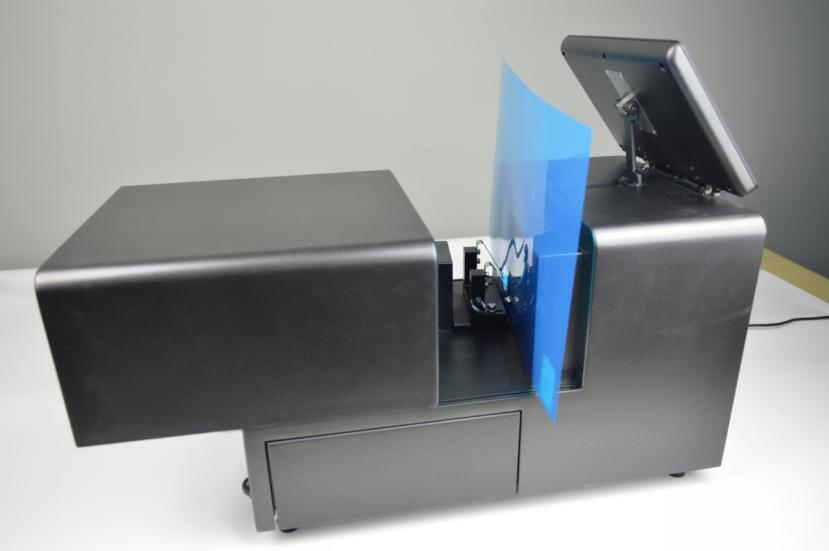
5. Open transmission sample compartment, accommodating large-size samples
The open transmission sample compartment is not limited by sample size and can easily handle even large-sized films.


6. Rich accessories 15 standard accessories and 12 optional accessories to meet the testing
needs in different scenarios.

7. The instrument comes with an accessories drawer for easy protection and storage of accessories.

8. Reflection measurement aperture can be switched Four measuring apertures, the instrument
automatically identifies the aperture and adjusts the optical path, no need to do it manually.

9. Four UV measurement modes to make fluorescence visible.

Specification:
| Model | CM-B820 |
| Illumination/Viewing System | Reflection: d/8(Diffused illumination, 8 degree viewing), Transmittance d/0 (Diffused illumination, 0 degree viewing), Simultaneous measurement of SCI/SCE (ISO7724/1, CIE No.15, ASTM E1164, ASTM-D1003-07, DIN5033 Teil7,JIS Z8722 Condition C standard) |
| Sensor | Silicon Photodiode Array |
| Grating Method | Concave Grating |
| Sphere Diameter | 152 mm |
| Wavelength | 360-780 nm |
| Wavelength Pitch | 10 nm |
| Half Band Width | 5 nm |
| Reflectance Range | 0-200% |
| Resolution | 0.01% |
| Light Source | Pulse Xenon Lamp and LED |
| UV Measurement | Include UV, 400 nm cut, 420 nm cut, 460 nm cut |
| Measurement Time | SCI/SCE < 2s, SCI+SCE < 4s |
| Measurement Aperture | Reflectance: XLAV Φ30 mm, LAV 18 mm, MAV Φ11 mm, SAV Φ6 mm Transmittance:Φ25 mm (Auto aperture size recognition) |
| Transmittance Sample Size | No limit on sample width and height, thickness ≤50 mm |
| Repeatability | XLAV Spectrum Reflectance/Transmittance: standard deviation within 0.1% XLAV Chromaticity value: Standard deviation within ΔE*ab 0.015* When a white calibration plate is measured 30 x at 5-second intervals after white calibration |
| Inter-Instrument Agreement | XLAV ΔE*ab 0.15 (BCRA Series II, Average measurement of 12 tiles, at 23 ℃) |
| Illuminants | A,C,D50,D55,D65,D75,F1,F2,F3,F4,F5,F6,F7,F8,F9,F10,F11,F12CWF,U30 ,DLF,NBF,TL83,TL84 |
| Language | English, Russian, Spanish, Portuguese, Japanese, Thai, Korean, German, French, Polish, Chinese (simple and traditional) |
| Display | Reflectance and Transmittance graph/value, color value, color difference values, pass/fail, color simulation, color assessment, haze, liquid chromaticity values, color tendency. |
| Viewing Angles | 2° and 10° |
| Color Spaces | Lab, LCh, Hunter Lab, Yxy, XYZ |
| Other Indices | WI(ASTM E313-00,ASTM E313-73,CIE,ISO2470/R457, AATCC,Hunter, Taube Berger, Stensby) YI(ASTM D1925,ASTM E313-00,ASTM E313-73), Tint(ASTM E313-00),Metamerism index milm, stain fastness, color fastness, ISO brightness, R457, A density, T density, E density, M Density, APHA/Pt-Co/Hazen, Gardner, Saybolt, ASTM color, Haze, Total Transmittance, Opacity, Color Strength |
| Color Difference | ΔE*ab, ΔE*CH, ΔE*uv, ΔE*cmc, ΔE*94, ΔE*00, ΔE*ab (Hunter), 555 shade sort |
| Storage Memory | 8 GB U Disk for data storage and transfer |
| Screen Size | 7 Inches Touch Screen |
| Audit Trail | Yes (according to FDA and CFDA requirements) |
| Power | 12 V/3 A |
| Operate Temperature | 5-40 ℃ (40-104 F), relative humidity 80% (at 35 ℃) no condensation |
| Storage Temperature | -20-45 ℃ (-4-113 F), relative humidity 80% (at 35 ℃) no condensation |
| Accessories | Power Adaptor, USB Cable, fixture for transmittance, U disk (PC software), Black Calibration Cavity, White and Green Calibration Tile, Reflectance Test Support,30 mm, 18 mm,11 mm and 6 mm apertures, reflectance sample fixture, Glass Cell 40×10 mm |
| Optional Accessories | Heating Fixture for Transmittance, Vertical Support and Pneumatic ram for downward measurement, Reflectance fixture for small size sample, Reflectance Glass Cell Support, Corrosion-Resistant Protective Plate (non-removable), Sample Holder for Fiber, Film Fixture, Transmittance Fixture for Small Aperture, Trolley Case, European Standard Plug, American Standard Plug |
| Interface | USB, USB-B and RS-232 |
| Other Function | 1. Camera to view measurement area. 2. Support horizontal, vertical and downward measurement method (need optional accessories to support for downward measurement). 3. Auto humidity and temperature compensation function. |
| External Size (W×D×H) | 465×240×260 mm |
| Shipping Size (W×D×H) | 450×570×470 mm |
| N.W/G.W. | 11 kg/15 kg |